
Hole by Hole
With beautiful fairways wrapped around spectacular gorges and lakes, this par 72 championship golf course designed by Graham Marsh can be enjoyed by all abilities. We have nine holes open, but you can still enjoy 18 holes playing the course twice. Once the additional nine holes open, this will undoubtedly be the jewel in the crown of Bingara Gorge.
HOLE 10
Xxxm | Par 4
From the Pro
A downhill par 4 that slopes from left to right. A tee shot left centre of the fairway will give you a favourable bounce and a good line to the green. The green is well guarded by three large bunkers and severe run off areas. Picking the correct club for your approach shot into this undulating green that slopes from back to front is the key.
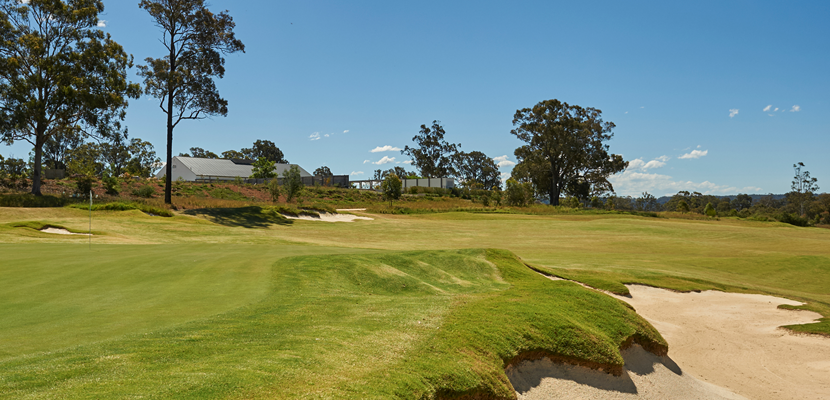
HOLE 11
Xxxm | Par 4
From the Pro
A short par 4, that is visually demanding – with water from tee to green, down the right and long rough all the way up the left. A tee shot should be aimed towards the bunker in the middle of the fairway, which is the widest part of the fairway and gives you a good angle to the flag. For longer hitters, aiming just right of the fairway bunker will give you a chance to knock it on the green. This large green slopes towards the water and is protected by two greenside bunkers.
HOLE 12
Xxxm | Par 4
From the Pro
The longest par 4 on the back nine that plays uphill all the way to the green. Aim your tee shot between the fairway bunkers for the widest part of the fairway. An approach shot to the middle of the green is ideal to any pin position, with three bunkers guarding the short left of the green and severe slopes to the right of the green. Taking an extra club is recommended as the approach shot in plays longer being uphill.
HOLE 13
Xxxm | Par 5
From the Pro
The first par 5 on the back nine requires a tee shot left of centre to utilise the slope of the fairway. A demanding second shot with water guarding the right side and bunkers guarding the left. For a conservative shot, lay up short of the grass tuffs in the middle of the fairway. For an aggressive shot, aim your shot over the grass tuffs to leave a short chip or an eagle putt. A large two tiered green protected by bunkers either side, and water to the right and long of the green. Pick your club wisely to leave yourself with a good putt on this green that slopes from back to front.
HOLE 14
Xxxm | Par 3
From the Pro
A long, strong par 3 that is visually demanding, with bunkers and water staring at you. With water all the way down the right side, focus on the left side of the green as your shot will feed towards the middle of the green. For the golfer who wishes to stay away from the water, a bail out area left of the green will leave you a moderately difficult chip over some undulating slopes with the green feeding towards the water and bunker to the right side of the green.
HOLE 15
Xxxm | Par 4
From the Pro
An elevated tee shot provides you with a bit of extra length off the tee. A tee shot to the left side of the fairway will give you the best angle to the green, but beware as the left side is guarded by numerous bunkers. A tough slopping and undulating green that is guarded by severe run off areas, and a bunker short right. Aiming for the middle of whichever tier the flag is on will leave you with the easiest putt.
HOLE 16
Xxxm | Par 4
From the Pro
The signature hole! Not a long hole but the tee shot over the gorge leaves some golfers trembling with fear. Correct club selection with a tee shot to the middle of the green is ideal to avoid the severe slopes and deep bunkers short of the green.
HOLE 17
Xxxm | Par 5
From the Pro
A long demanding double dogleg par 5 that is best played as a three shot hole. Aim your tee shot to the right side of the fairway to give yourself the best angle for your next shot. The ideal layup area is short of the fairway bunker, this will leave you with a short shot to this narrow two tiered green. For the golfers wishing to go for the green on their second shot, two bunkers, some steep slopes and tall trees protect all angles of this green.
HOLE 18
Xxxm | Par 4
From the Pro
Moderate in length, this par 4 rewards the golfers who take their tee shots further left towards the three large bunkers as this leaves you a shorter approach shot to the green. This hole favours golfers who hit with a right to left ball flight to take advantage of the generous bounce off the fairway that slopes from right to left. The green is one of the largest on the course and can play up to four clubs differently depending on the flag position. The green is well guarded with severe run off areas, a large bunker to the left and long grass to the right.